


How do I update the firmware on my Mōvi Controller?
There are a few prerequisites to updating the firmware on your Mōvi Controller.
- You need a computer with an active USB port, running one of the following operating systems: Windows 7, 8 or 10, or MacOS X or newer.
- You need active FTDI Virtual COM Port (VCP) Drivers installed. These may already be included in your operating system. If not, they are included in the Freefly Mōvi Controller Firmware Update Tool package for each operating system.
- The USB A-A cable that was included with Mōvi Controller. The bottom USB port of the Mōvi Controller is the one used for firmware updates.
Below you will find the instructions to install the Firmware Updater as well as how to update the firmware on your Mōvi Controller on both macOS and Windows (the steps differ slightly).
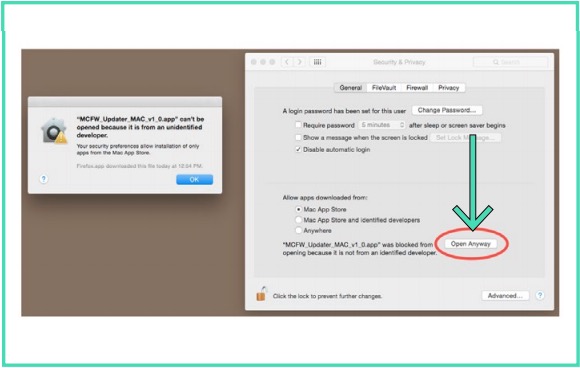
1. The macOS version of the Mōvi Controller Firmware Update Tool can be found in the MOVI_Controller_vX.X.X_Mac.ZIP folder on the Software and Manuals downloads page. Double click to extract the .zip file and then double click the resulting .app. If a security warning may appears, open the Security and Privacy section of System Preferences, and click Open Anyway.
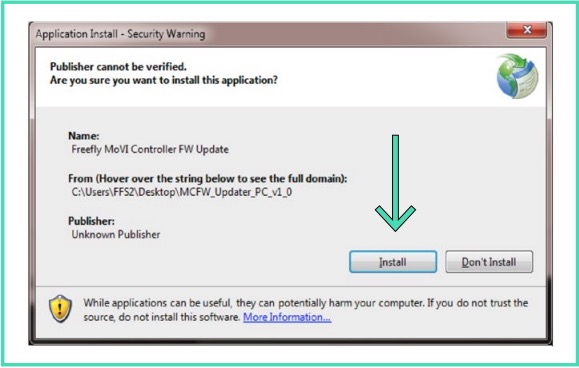
The Windows version of the Mōvi Controller Firmware Update Tool can be found in the MOVI_Controller_vX.X.X_Windows folder on the Software and Manuals downloads page. Unzip the folder and run setup.exe. A security warning may appear. Click Install.
OSX
Windows
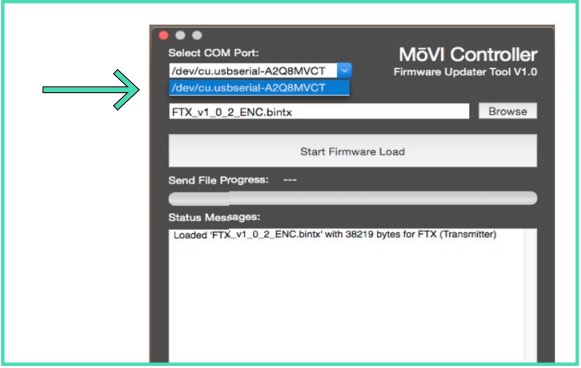
2. After a moment, the Mōvi Controller Firmware Updater will start. Plug in the Mōvi Controller into the computer using the bottom USB port (indicated below) USB cable as shown above. No battery/power is required, nor is turning the controller on, as the USB connection will power the controller.

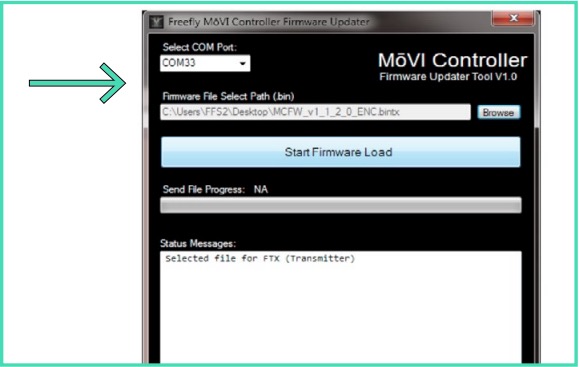
A new COM Port should appear in the drop down menu on your computer. Select this COM Port.
macOS
Windows
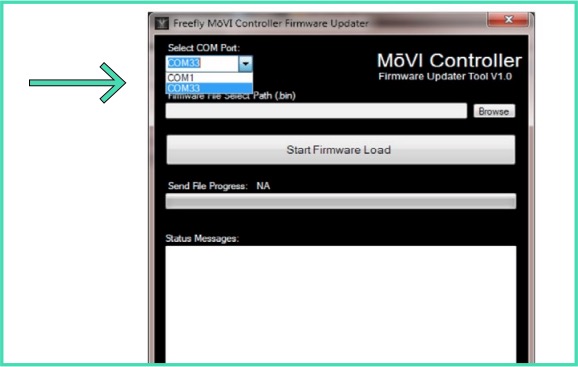
* If the Mōvi Controller was already plugged in, the COM Port should already be present. If you’re not sure which COM Port is associated with the Mōvi Controller, unplug it and see which one disappears.
3. With the COM Port of the Mōvi Controller selected, browse for the new firmware file using the Browse button. The name of the file is movi_controller_XXX_X_X_X.bin.
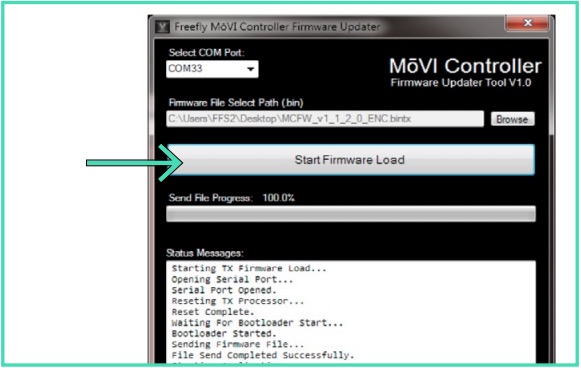
4. With the firmware file selected, click Start Firmware Load. After a few seconds, the new firmware file will be sent to the Mōvi Controller. Wait for the progress to reach 100%.
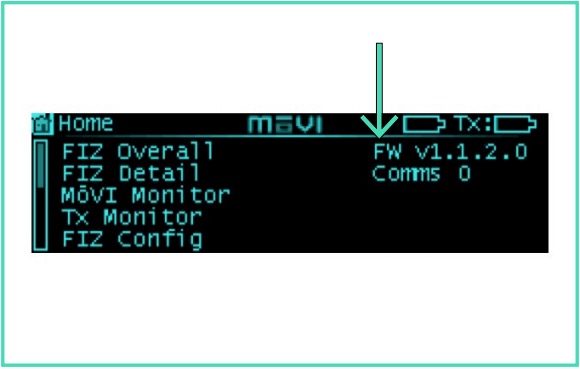
5. Confirm that the new firmware has been loaded onto the Mōvi Controller. The version number will be presented in the top right corner of the display. It should match the number that the .bin file was labeled with.
Troubleshooting
If the firmware fails to load (macOS):
- Ensure FTDI VCP USB driver 2.2.18 or later is installed (be sure to reboot mac after driver installation).
- Disconnect all cables (including power and USB) from Controller. Reconnect USB to reboot Controller and try again, starting at step 2 by opening the Firmware Installer from where it installed on your computer.
Connection Troubleshooting (Windows):
- If no COM Port appears or if Windows asks for Device Drivers when the Mōvi Controller is plugged in, install the FTDI VCP driver included in the software package:
- Unplug the Mōvi Controller and close the Firmware Update Tool
- Run CDM v2.12.00 WHQL Certified.exe from the software folder.
- Follow the FTDI Driver installation program instructions.
- Restart the Firmware Update process at Step 1 above.
Still need help? Get in touch with our support team.
Contact Us